
미디어 콘텐츠 스터디
Part10. 연속 이동(Continuous Movement) 본문
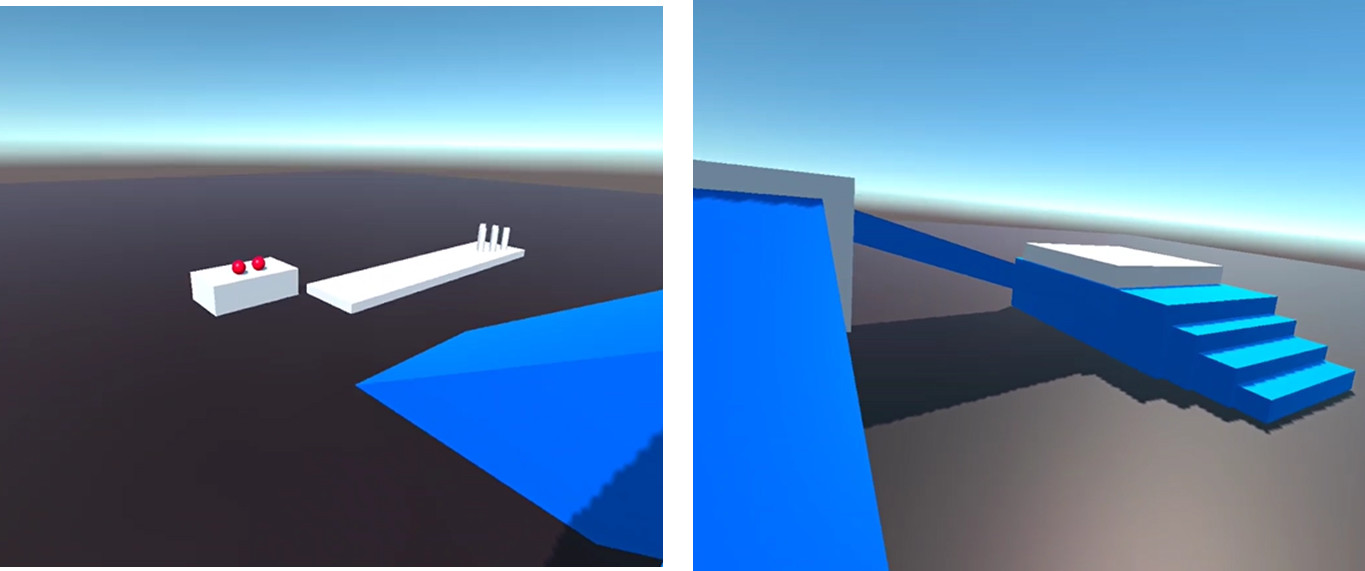
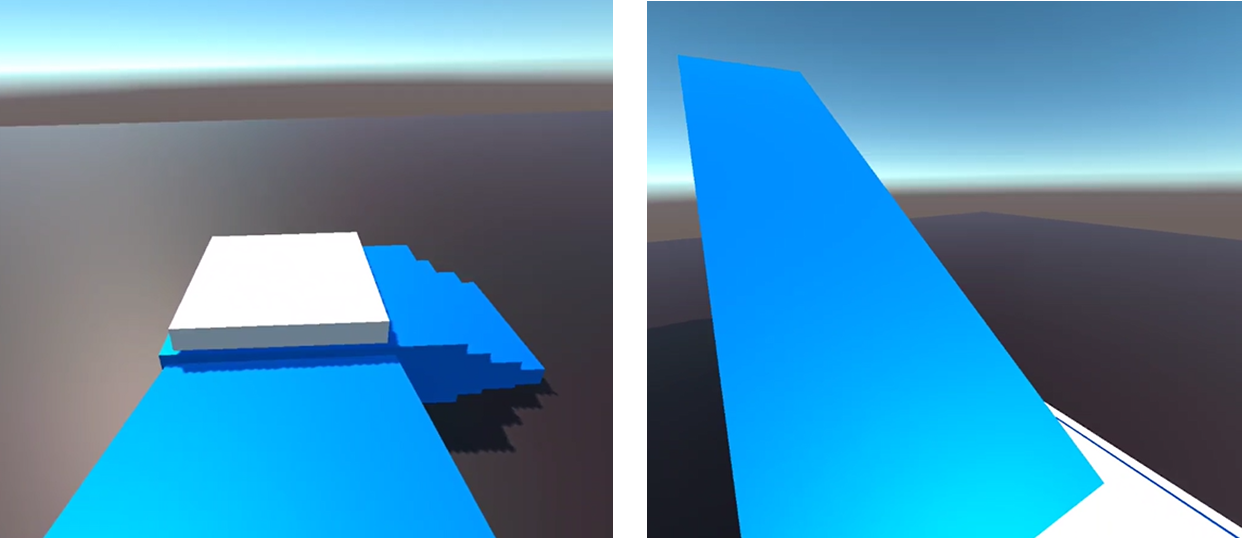
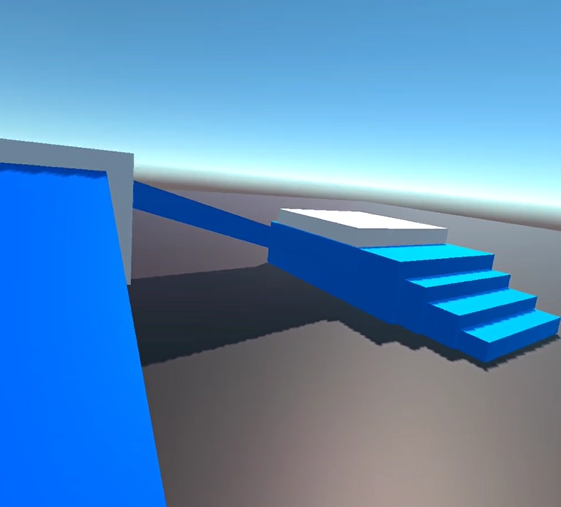
1. 경사면과 계단 만들기
① GameObject | Create Empty 메뉴를 선택하여 하이러키 창에 GameObject 추가하고 이름을 Platform으로 변경한다.
② 하이러키 창에서 Platform 하위에 GameObject | 3D Object | Cube 메뉴를 선택하여 Cube 10개 추가한다.
- Cube(1) : Position(2,53, -0.071, 0.78), Rotation(0,0, 29.60), Scale(4.03,1, 1.84)
- Cube(2) : Position(6.88, -0.33, 0.78), Rotation(0,0, -45.41), Scale(4.03,1, 1.84)
- Cube(3) : Position(4.92, 0.956, 0.78), Rotation(0,0, -0.41), Scale(1.92,1, 2.2)
- Cube(4) : Position(4.94, 2.4, 3.9), Rotation(-30, 0.23, -0.47), Scale(1.4,1, 5.95)
- Cube(5) : Position(4.64, -0.14, -3.69), Rotation(0,0, 0), Scale(2.57, 1.63, 1.9)
- Cube(6) : Position(3.9, -0.33, -3.69), Rotation(0,0, 0), Scale(1.63, 1.63, 1.73)
- Cube(7) : Position(3.56, -0.49, -3.69), Rotation(0,0, 0), Scale(1.63, 1.63, 1.63)
- Cube(8) : Position(3.29, -0.63, -3.69), Rotation(0,0, 0), Scale(1.63, 1.63, 1.55)
- Cube(9) : Position(4.92, 0.81, -1.56), Rotation(-15.69, 0.11, -0.42), Scale(1.92, 0.2, 2.69)
- Cube : Position(4.92, 0, -3.69) , Rotation(0,0,0), Scale(1.8, 1.8, 1.8)

2. 연속 이동 만들기
2.1 시선방향으로 회전하기
① 하이러키 창에서 XR Origin 선택한 후 인스펙스 창에서 [Add Component] 버튼을 클릭하여 Locomotion System 컴포넌트 추가하고 XR Origin에 XR Origin 오브젝트 설정한다.
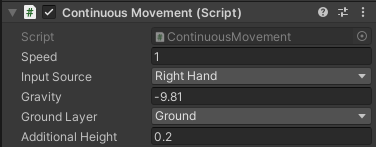
② 하이러키 창에서 XR Origin 선택한 후 인스펙스 창에서 [Add Component]버튼을 클릭하여 새로운 ContinuousMovement 스크립트 추가하고 코드를 작성한후 인스펙터 창에 Input Source에 RightHand 설정한다.
using System.Collections;
using System.Collections.Generic;
using UnityEngine;
using UnityEngine.XR;

public class ContinuousMovement : MonoBehaviour
{
    public XRNode inputSource;

    // Start is called before the first frame update
    void Start()
    {

    }

    // Update is called once per frame
    void Update()
    {

    }

  }
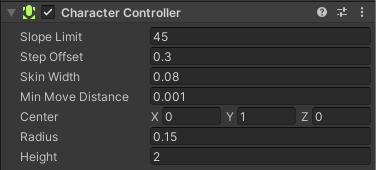
③ 하이러키 창에서 XR Origin 선택한 후 인스펙스 창에서 [Add Component] 버튼을 클릭하여 Character Controller 컴포넌트 추가한다.
- Center(0,1, 0), Radius : 0.15
④ 하이러키 창에서 XR Origin 선택한 후 인스펙스 ContinuousMovement 스크립트를 수정한다.
using System.Collections;
using System.Collections.Generic;
using UnityEngine;
using UnityEngine.XR;
using Unity.XR.CoreUtils;

public class ContinuousMovement : MonoBehaviour
{

    public XRNode inputSource;
    public float speed = 1;

    private float fallingSpeed;
    private XROrigin origin;
    private Vector2 inputAxis;
    private CharacterController character;

    // Start is called before the first frame update
    void Start()
    {
        character = GetComponent<CharacterController>();
        origin = GetComponent<XROrigin>();
    }

    // Update is called once per frame
    void Update()
    {
        InputDevice device = InputDevices.GetDeviceAtXRNode(inputSource);
        device.TryGetFeatureValue(CommonUsages.primary2DAxis, out inputAxis);
    }

    private void FixedUpdate()
    {

        Quaternion headYaw = Quaternion.Euler(0, origin.Camera.transform.eulerAngles.y, 0);
        Vector3 direction = headYaw *  new Vector3(inputAxis.x, 0, inputAxis.y);

        character.Move(direction * Time.fixedDeltaTime * speed);

       fallingSpeed = -10;
        character.Move(Vector3.up * fallingSpeed * Time.fixedDeltaTime);
    }

}
⑤ 실행하기
=> 시선 방향에 따라 Platform 오브젝트 및 전체 오브젝트가 이동함
2.2 일정 속도로 내려가고 바닥체크하기
① 아래로 내려가는 속도가 일정하지 않기 때문에 시간이 지남에 따라 속도를 일정한 값으로 지정하도록 하기 위해 ContinuousMovement 스크립트 수정한다.
using System.Collections;
using System.Collections.Generic;
using UnityEngine;
using UnityEngine.XR;
using Unity.XR.CoreUtils;

public class ContinuousMovement : MonoBehaviour
{
    public XRNode inputSource;
    public float speed = 1;
    public float gravity = -9.81f;
    public LayerMask groundLayer;
    public float additionalHeight = 0.2f;

    private float fallingSpeed;
    private XROrigin origin;
    private Vector2 inputAxis;
    private CharacterController character;

    // Start is called before the first frame update
    void Start()
    {
        character = GetComponent<CharacterController>();
        origin = GetComponent<XROrigin>();
    }

    // Update is called once per frame
    void Update()
    {
        InputDevice device = InputDevices.GetDeviceAtXRNode(inputSource);
        device.TryGetFeatureValue(CommonUsages.primary2DAxis, out inputAxis);
    }

    private void FixedUpdate()
    {
        Quaternion headYaw = Quaternion.Euler(0, origin.Camera.transform.eulerAngles.y, 0);
        Vector3 direction = headYaw *  new Vector3(inputAxis.x, 0, inputAxis.y);

        character.Move(direction * Time.fixedDeltaTime * speed);

        //gravity
        bool isGrounded = CheckIfGrounded();
        if (isGrounded)
            fallingSpeed = 0;
        else
            fallingSpeed += gravity * Time.fixedDeltaTime;

        character.Move(Vector3.up * fallingSpeed * Time.fixedDeltaTime);
    }

    bool CheckIfGrounded()
    {
        //tells us if on ground
        Vector3 rayStart = transform.TransformPoint(character.center);
        float rayLength = character.center.y + 0.01f;
        bool hasHit = Physics.SphereCast(rayStart, character.radius, Vector3.down, out RaycastHit hitInfo, rayLength, groundLayer);
        return hasHit;
    }
}
② 하이러키 창에서 XR Origin 선택한 후 인스펙트 창에서 Layer속성에 Add Layer..메뉴 선택하여 Ground 등록한다.
③ 하이러키 창에서 XR Origin을 선택한후 인스텍터 창에 ContinuousMovement 컴포넌트의 Gound Layer속성을 Ground 으로 설정한다.
④ 실행하기
2.3 이동에 따른 캐릭터 움직이기
①하이러키 창에서 XR Origin을 선택한후 인스텍터 창에 ContinuousMovement 스크립트를 수정한다.
using System.Collections;
using System.Collections.Generic;
using UnityEngine;
using UnityEngine.XR;
using Unity.XR.CoreUtils;

public class ContinuousMovement : MonoBehaviour
{
    public float speed = 1;
    public XRNode inputSource;
    public float gravity = -9.81f;
    public LayerMask groundLayer;
    public float additionalHeight = 0.2f;

    private float fallingSpeed;
    private XROrigin origin;
    private Vector2 inputAxis;
    private CharacterController character;

   ....

    private void FixedUpdate()
    {
        CapsuleFollowHeadset();

        Quaternion headYaw = Quaternion.Euler(0, origin.Camera.transform.eulerAngles.y, 0);
        Vector3 direction = headYaw *  new Vector3(inputAxis.x, 0, inputAxis.y);

       ....
    }

    void CapsuleFollowHeadset()
    {
        character.height = origin.CameraInOriginSpaceHeight + additionalHeight;
        Vector3 capsuleCenter = transform.InverseTransformPoint(origin.Camera.transform.position);
        character.center = new Vector3(capsuleCenter.x, character.height/2 + character.skinWidth , capsuleCenter.z);
    }
...
}
② 실행하기
2.4 부드럽게 이동하기
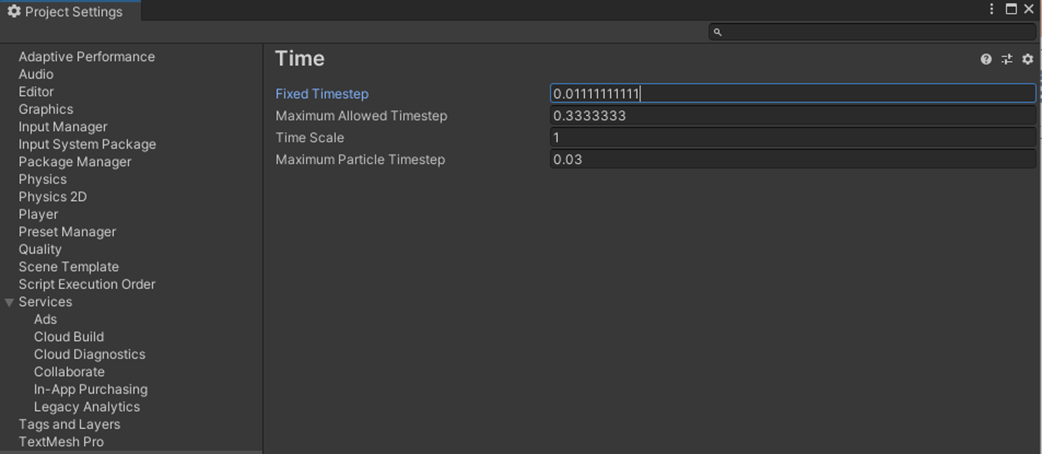
① Edit->Project Settings 메뉴선택하고 Time 항목 선택하고 Fixed Timestemp : 0.0111111111111로 수정한다.
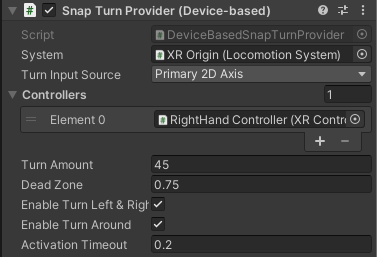
② 하이러키 창에서 XR Origin 선택한 후 인스펙터 창에서 [Add Component]버튼을 클릭하여 Snape Turn Provider(Device-based) 컴포넌트 추가한다.
- System : XR Origin
- Controllers : RightHand Controller설정
- Activation Timeout : 0.2
③ 실행하기
'가상현실(Virtual Reality) > 가상현실 기초 다루기' 카테고리의 다른 글
| Part12 거울(Mirror) (0) | 2022.08.20 |
|---|---|
| Part11. 푸시 버튼(Push Button) (0) | 2022.08.20 |
| Part00. XR 환경 설정 (0) | 2022.08.17 |
| Part09. 암벽 오르기(Climbing) (0) | 2022.08.13 |
| Part08. 양손 잡기 상호작용(Two Hand Grab Interation) (0) | 2022.08.11 |


