
미디어 콘텐츠 스터디
07. 부드러운 확대 전환(Smooth Stretch Transitions) 본문
1. 프로젝트 만들기
- Project Name : Stretch Transitions
2. 영상 불러오기
motorcyclist01.mp4
6.07MB
motorcyclist02.mp4
5.46MB
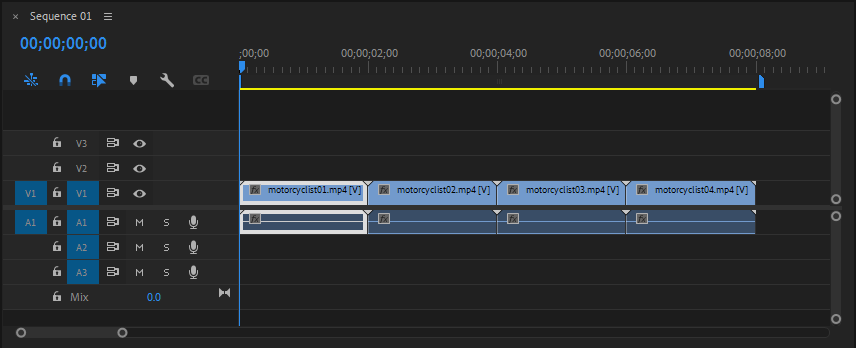
3. 시퀀스 만들기
- 시퀀스 생성
- motocyclist01.mp4와 motocyclist02.mp4, motocyclist03.mp4, motocyclist04.mp4를 타임라인의 V1 트랙에 연속 배치
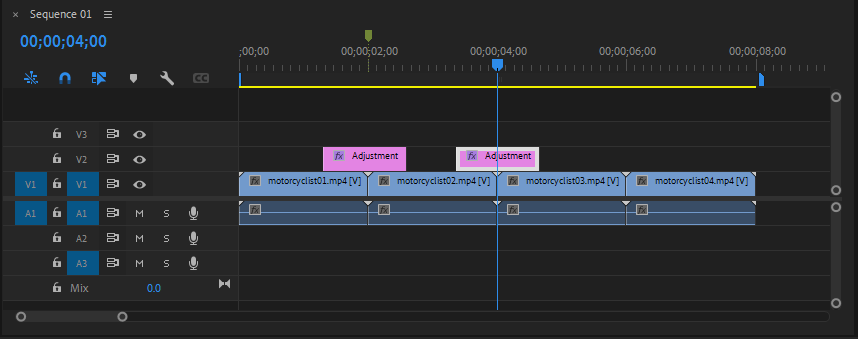
4. Flash 전환 설정 - 첫 번째 전환 (01 → 02 사이)
- Adjustment Layer를 생성하여 motocyclist01.mp4와 motocyclist02 ,mp4의 중간지점에 V2 트랙에 배치
- motocyclist01.mp4와 motocyclist02 ,mp4의 중간지점(02:00F)에 마커 추가
- V2의 Adjustment Layer에 Video Effects > Transform > Transform 적용
- Uniform Scale : 체크 해제
- Scale 키프레임 설정
- 01:20F Scale Width : 100(Easy In)
- 02:00F Scale Width : 200 (Easy In)
- 02:10F Scale Width : 100 (Easy Out)

-
- Anchor Point : 0.0, 540
- Position : 0.0, 540
=> 왼쪽을 고정함

※ 오른쪽을 고정할 경우 Anchor Point : 1920, 540/Position : 1920 , 540
-
- Scale Width : 그래프 수정

- V2의 Adjustment Layer에 Video Effects > Blur & Sharpen > Gaussian Blur 적용
- Blur Dimensions : Horizontal
- Blurriness 키프레임 설정
- 01:20F Blurriness : 0(Easy In)
- 02:00F Blurriness : 400 (Easy In)
- 02:10F Blurriness : 0 (Easy Out)
- Blurriness : 그래프 수정


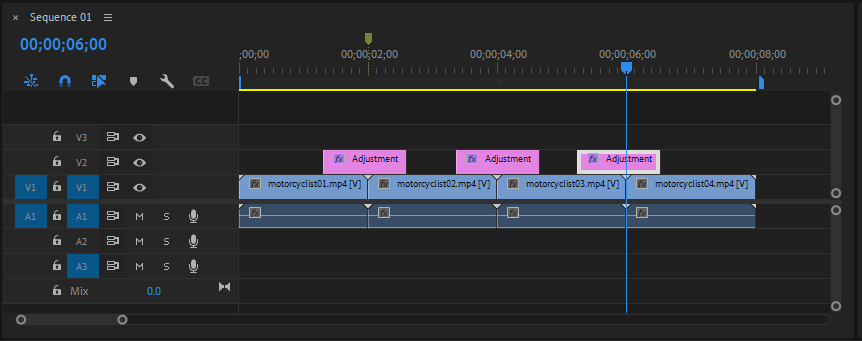
5. 두 번째 전환 (02 → 03 사이)
- V2의 Adjustment Layer를 복제하여 motocyclist02.mp4, motocyclist03.mp4 클립 중간지점에 배치
- Anchor Point와 Position 키프레임 설정
- 03:29F Anchor Point : 0, 540/ Position : 0, 540
- 04:00F Anchor Point : 1920, 540/ Position : 1920, 540

6. 세 번째 전환 (03 → 04 사이)
- V2의 Adjustment Layer를 복제하여 motocyclist03.mp4, motocyclist04.mp4 클립 중간지점에 배치
- Anchor Point와 Position 키프레임 설정
- 03:29F Anchor Point : 1920 , 540/ Position : 1920 , 540
- 04:00F Anchor Point : 0, 540/ Position : 0, 540

'프리미어 프로(Premiere Pro) > 트랜지션' 카테고리의 다른 글
| 09. 스냅샷 사진 정지 전환(SNAPSHOT Photo FREEZE Frame Effect) (0) | 2025.08.03 |
|---|---|
| 08. 부드러운 줌 전환(Smooth Zoom Transition) (0) | 2025.07.30 |
| 06. 플래쉬 전환 (0) | 2025.07.29 |
| 05. 모션 블러로 활용한 줌 전환 (0) | 2025.06.26 |
| 04. 확대 블러 전환 (0) | 2025.06.26 |
'프리미어 프로(Premiere Pro)/트랜지션' Related Articles
more


Comments