Part03. 순간 이동(Teleportation)
1. Ray Interactor 설정하기
① GameObject | XR | Device- based | Ray Interactor 메뉴 선택하여 하이러키 창에 Ray Interactor 오브젝트 추가한다.
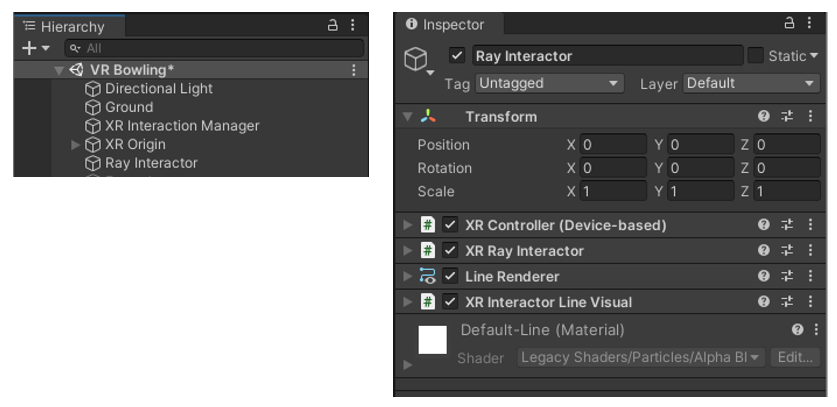
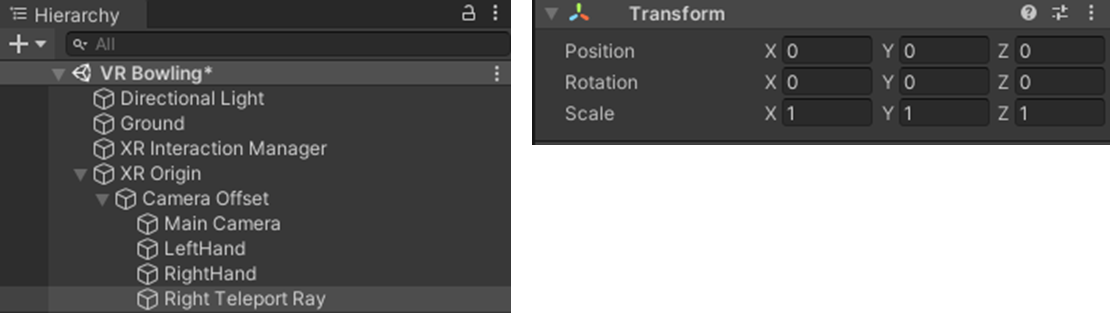
② Ray Interactor오브젝트를 XR Origin->Camera Offset 하위로 이동하고, 인스펙트 창에서 Transform 컴포넌트 초기화
이름을 Right Teleport Ray로 변경한다.
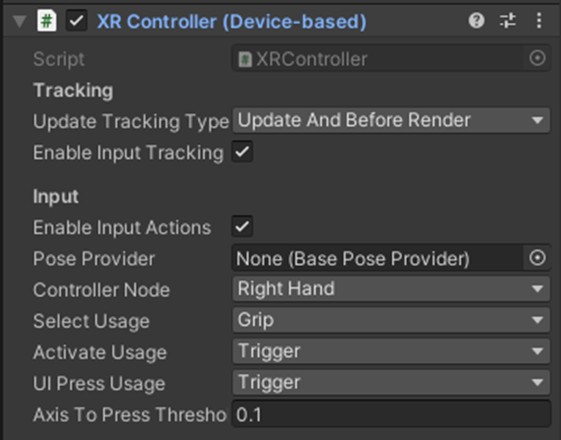
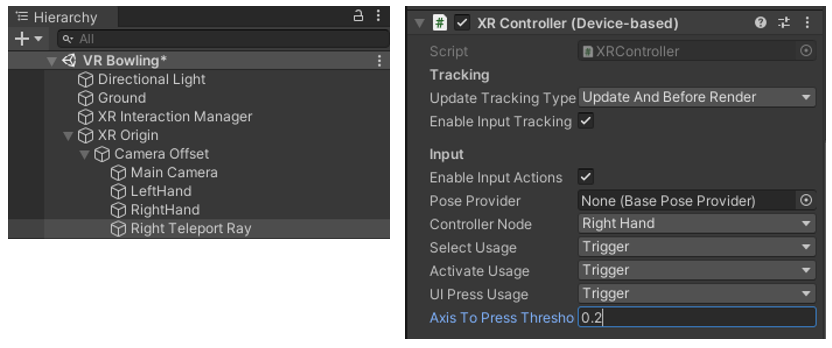
③ 인스펙트창에서 XR Controller의 Controller Node 속성값을 Right Hand로 설정한다.
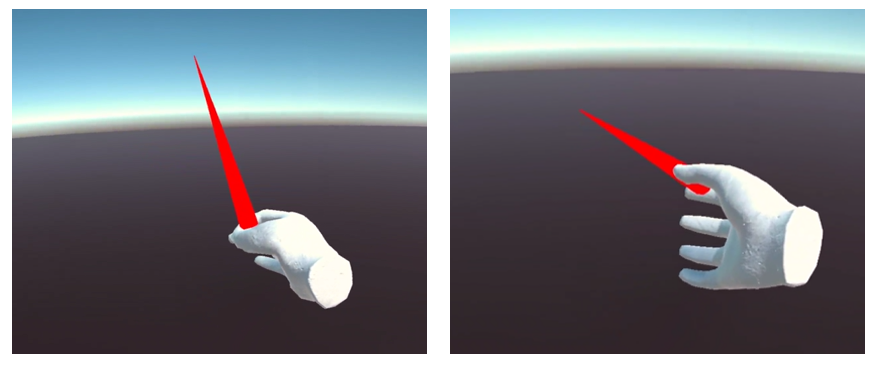
④ 실행하기
2. 순간 이동 만들기
2.1 TeleportationProvider 설정하기
TeleportationProvider는 사용자의 요청에 따라 XR Origin을 원하는 위치로 이동하는 역할을 한다.
① 하이러키 창에서 XR Origin을 선택한 후 인스펙터 창에서 [Add Component] 버튼을 클릭하여 Teleportation Provider 와Locomotion System 컴포넌트 추가한다.
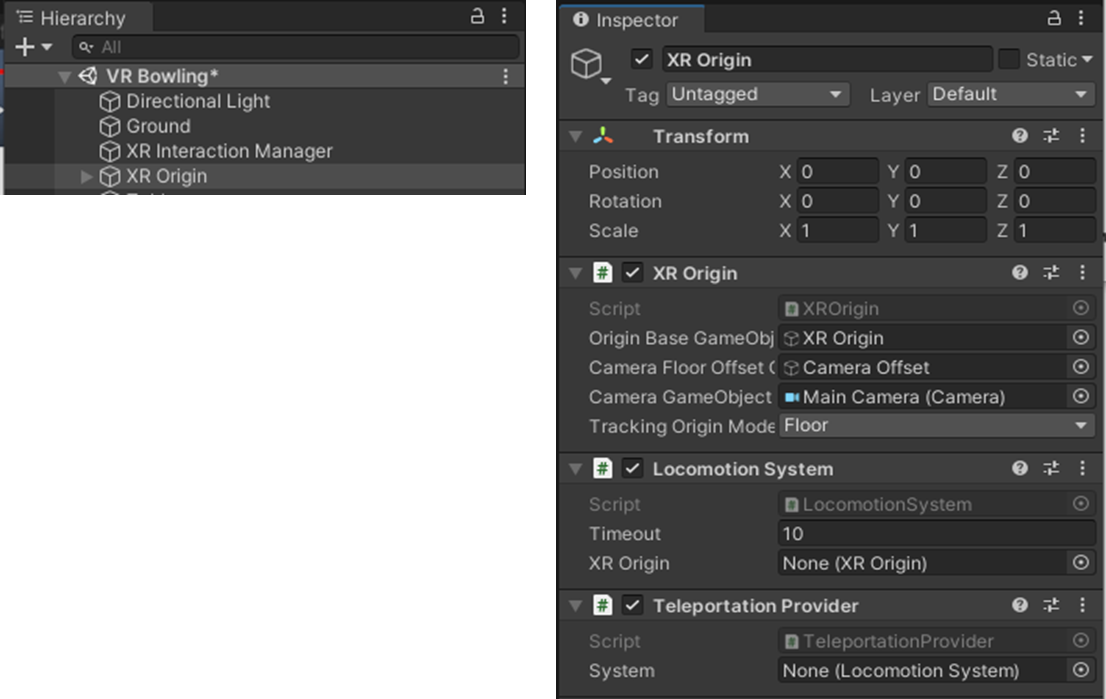
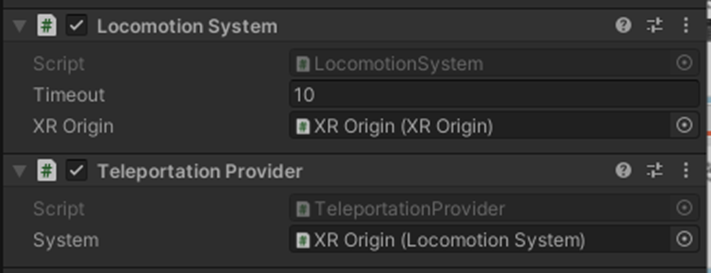
② 하이러키 창에서 XR Origin을 선택한 후 인스펙터 창에 Locomotion System의 XR Origin속성과 Teleportation Provider 의 System 속성에 XR Origin을 설정한다.
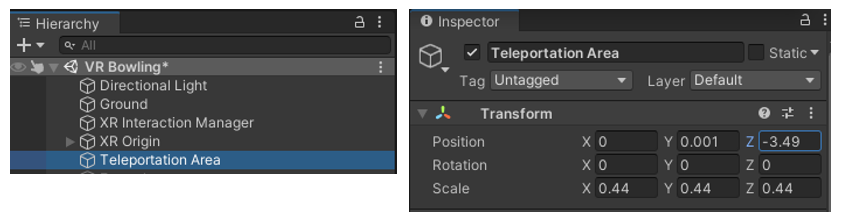
2.2 Teleportation Area 설정하기
Teleportation Area는 사용자가 지정한 표면 위치로 순간이동하는 목적지이다.
① GameObject | XR | Teleportation Area메뉴 선택하여 하이러키 창에 Teleportation Area 오브젝트 추가한 후 인스펙터 창에서 Transform 컴포넌트의 Position(0, 0.001, -3.49), Scale(0.44, 0.44, 0.44)로 설정한다.
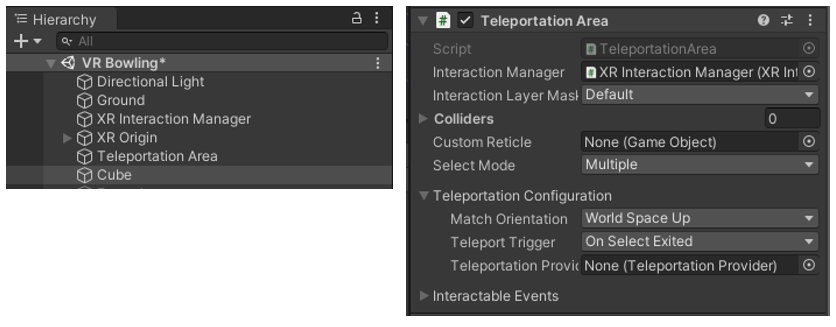
② GameObject | 3D Object | Cube 메뉴 선택하여 하이러키 창에 Cube 오브젝트 추가한 후 인스펙터 창에서 Transform 컴포넌트의 Position(4.67, 0, -3.69), Scale(1.8, 1.8, 1.8)로 설정한다.
③ 하이러키 창에 Cube 오브젝트를 선택하고 인스펙터 창에서 [Add Component]를 클릭하여 Teleportation Area 컴포넌트 추가한다.
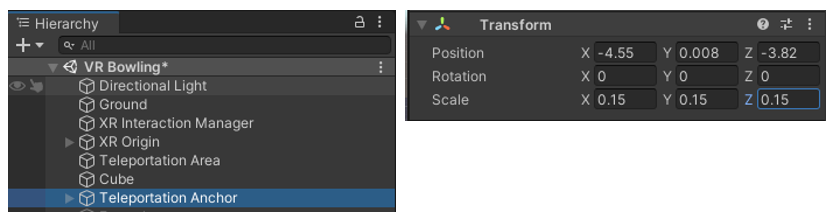
2.3 Teleportation Anchor 설정하기
Teleportation Anchor는 사용자가 미리 결정된 특정 위치 및/또는 회전으로 순간이동하는 목적지이다.
① GameObject | XR | Teleportation Anchor 메뉴 선택하여 하이러키 창에Teleportation Anchor 오브젝트 추가한후 인스펙터 창에서 Transform 컴포넌트의 Position(-4.55, 0.008, -3.82), Scale(0.15, 0.15, 0.15)로 설정한다.
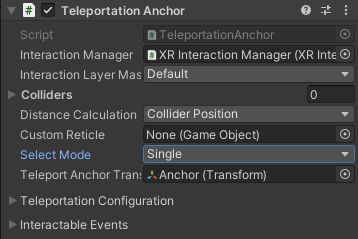
② 하이러키 창에서 Teleportation Anchor 오브젝트를 선택한후 인스펙터 창에서 Teleportation Anchor 컴포넌트의 Select Mode 속성값을 Single로 변경한다.
③ 실행하기

3. 트리거 버튼 조작
3.1 컨트롤러의 트리거로 순간이동하기
① 하이러키 창에서 XR Origin-> Right Teleport Ray 오브젝트를 선택한 후 인스펙터 창에서 XR Controller 컴포넌트의 Select Usage 속성값을 Trigger로 변경한다.
② Axis To Press Threshold속성값을 0.2로 변경한다.
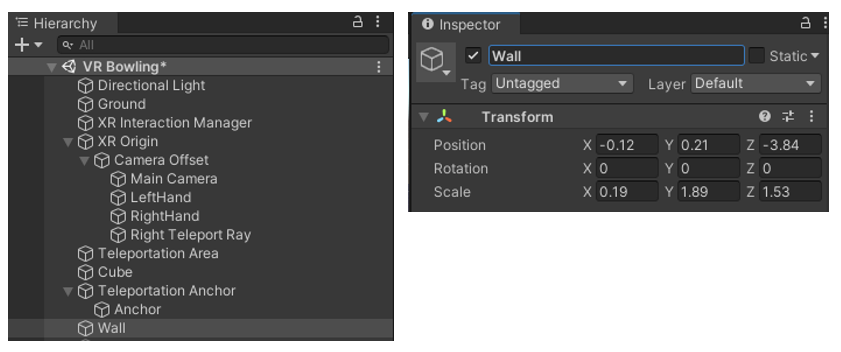
③ GameObject | 3D Object | Cube 메뉴 선택하여 하이러키 창에 Cube오브젝트 추가한후 인스펙터 창에서 Transform 컴포넌트의 Position(-0.12, 0.21, -3.84), Scale(0.19, 1.89, 1.53)로 설정, 이름을 Wall로 변경한다.
④ 실행하기

3.2 트리거로 볼 잡기 해제하기
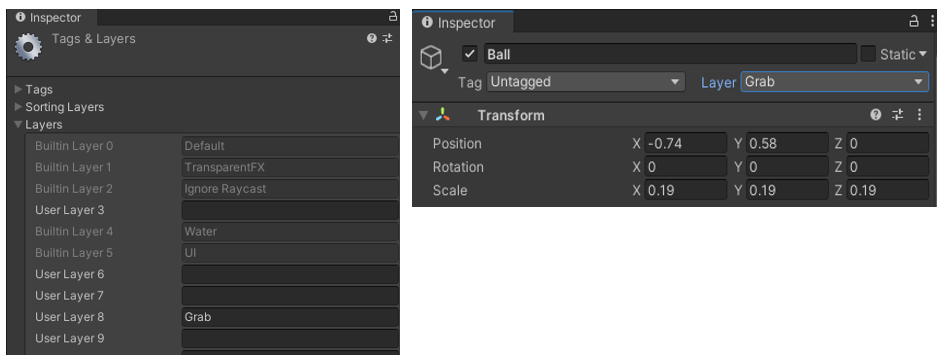
① 하이러키 창에서 Bowling Ball을 선택한 후 인스펙터 창에서 Layer 속성의 Add Layer…메뉴 선택한다.
② Layers의 User Layer8에 Grab 입력한후 하이러키 창에서 Bowling Ball을 선택하고 인스펙터 창에 Layer 속성에 Grab 메뉴 선택하여 설정한다.
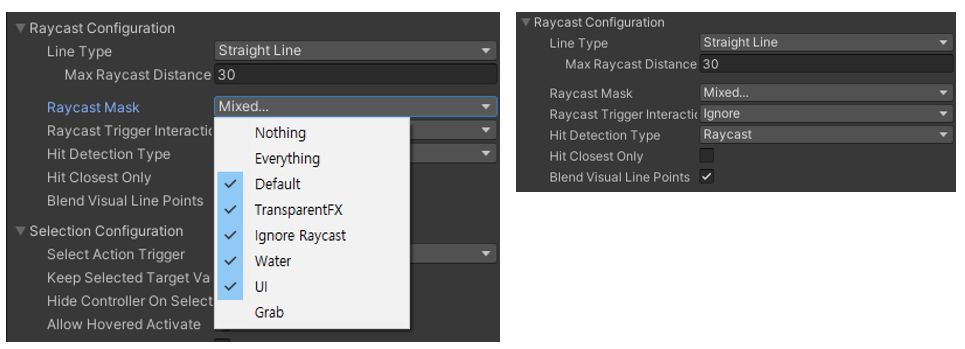
③ 하이러키 창에서 XR Origin의 Right Teleport Ray를 선택한후 인스펙터 창에서 XR Ray Interactor 컴포넌트의 Raycast Mask 속성에서 Grab항목 선택하지 않는다.
④ 실행하기
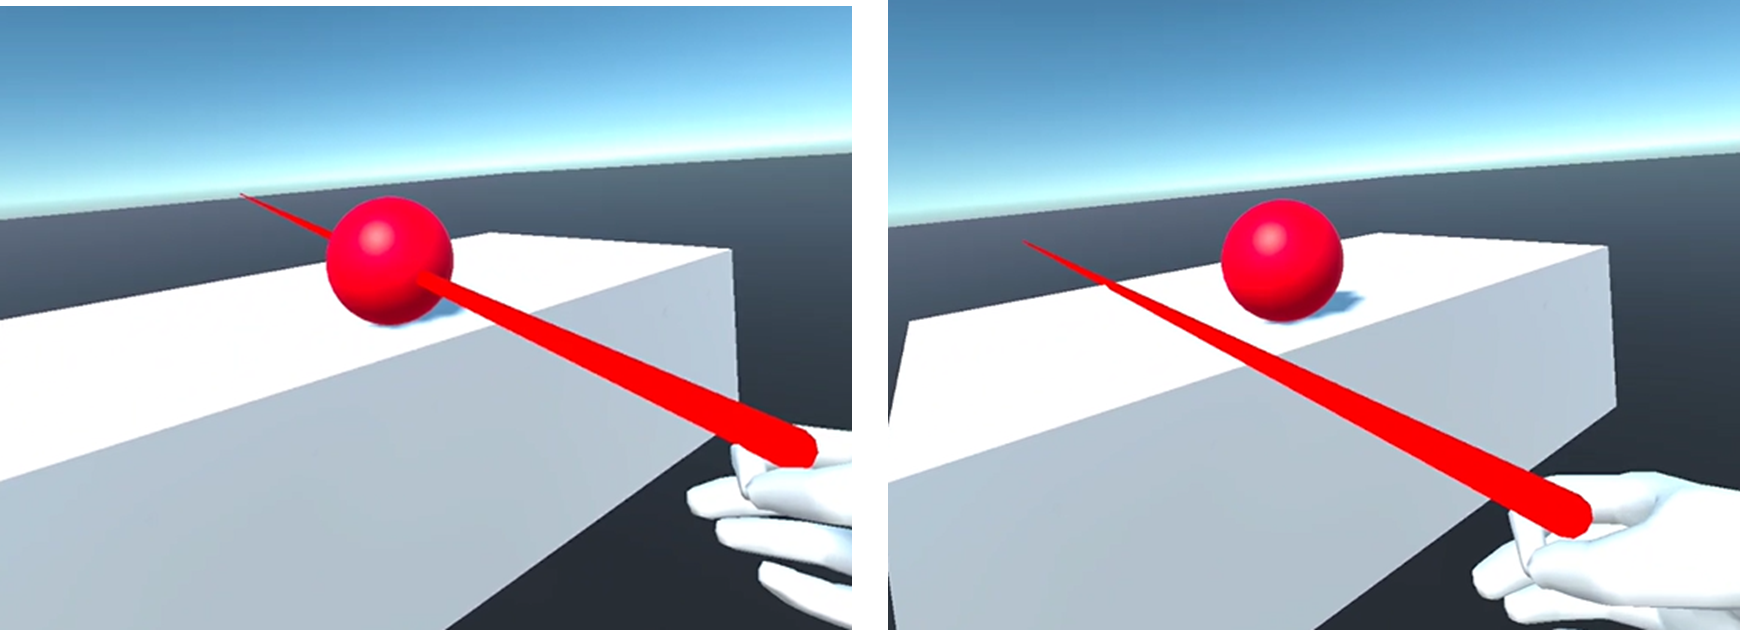
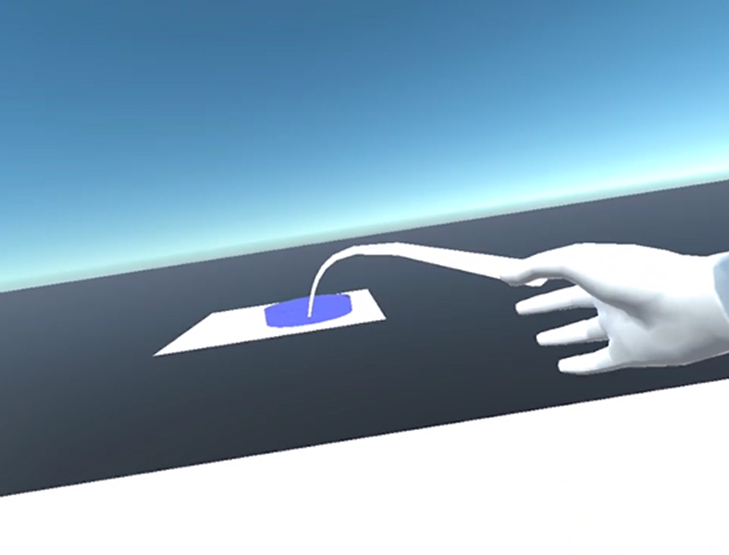
4. Teleport Ray 만들기
4.1 Ray Interactor 변경하기
① 하이러키 창에서 XR Origin의 Right Teleport Ray를 선택한후 인스펙터 창에서 Raycast Configuration의 설정 변경한다.
- Line Type : Projectile Curve로 변경
- Reference Frame : XR Origin 설정
- Valocity : 8
② Enable Interaction with UI GameObject 속성을 언체크한다.
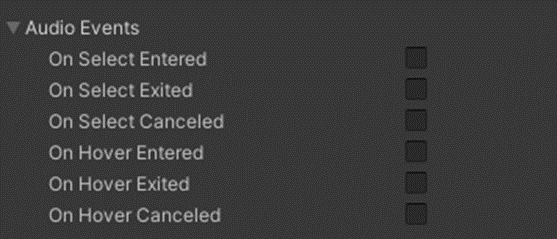
③ Audio Events 컴포넌트의 모든 속성 언체크한다.
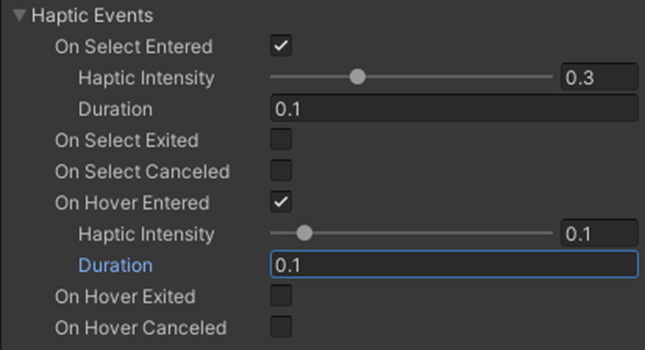
④ Haptic Events 컴포넌트의 On Select Entered 체크한다.
- Hatic Intensity : 0.3
- Duration : 0.1
⑤ Haptic Events 컴포넌트의 On Hover Entered체크한다.
- Haptic Intensity : 0.1
- Duration : 0.1
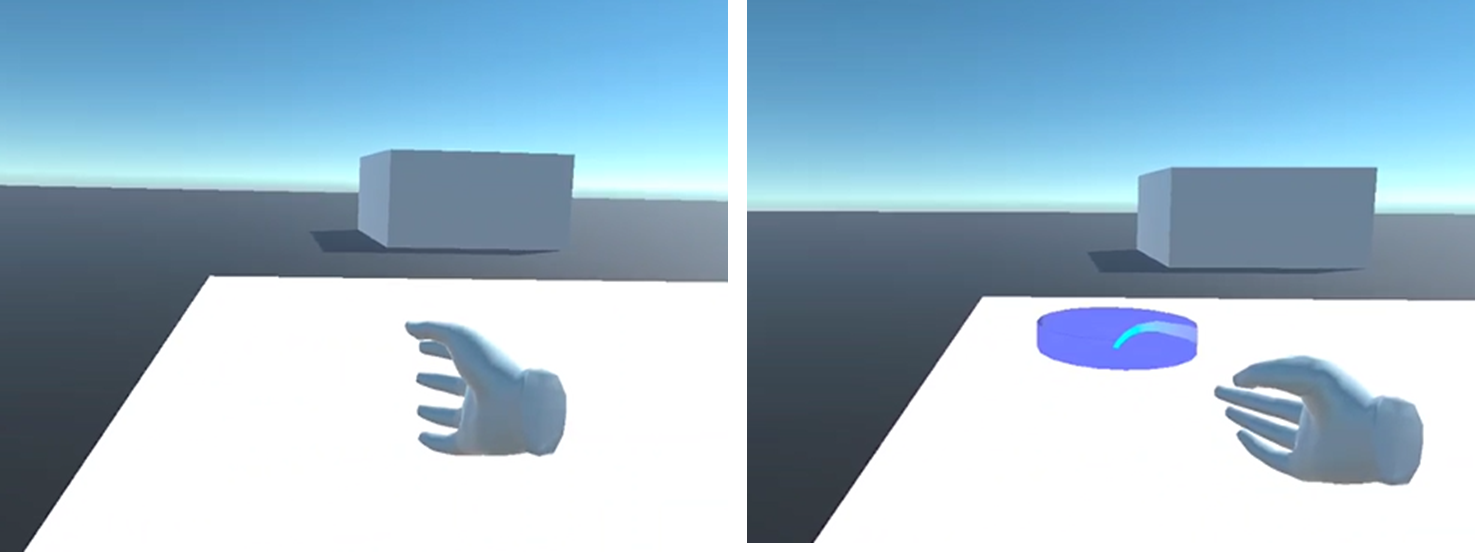
4.2 선택 지점 표시하기
① 하이러키 창에서 GameObject | 3D Object | Cylinder 메뉴 선택한 후 이름을 Teleport Reticle 로 변경한다.
② 인스펙터 창에 Capsule Collider 컴포넌트 비활성화/삭제한다.
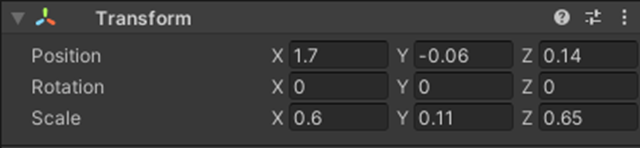
③ 하이러키 창에서 Teleport Reticle오브젝트의 인스펙터 창에 Transform컴포넌트 속성값을 변경한다.
- Position(1.7, -0.06, 0.14)
- Scale(0.6, 0.11, 0.65)
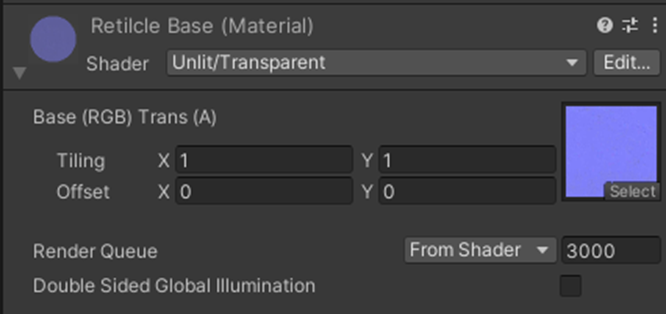
④ 프로젝트 창에 Assets/Materials폴더에 Create|Material 선택하여 머티리얼 생성하고 이름을 Reticle Base로 변경하고, Teleport Retilcle의 머티리얼로 설정한다.
⑤ 인스펙터 창에서 Shader를 Unit/Transprent로 변경, Select에 텍스쳐 선택한다.
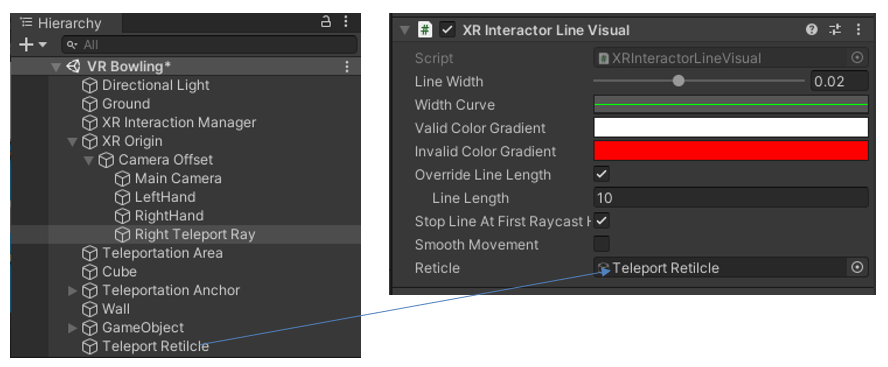
⑥ 하이러키 창에서 XR Origin의 Right Teleport Ray를 선택한후 인스펙터 창에서 XR Interactor Visual 컴포넌트에서 Reticle속성에 Teleport Reticle로 설정한다.
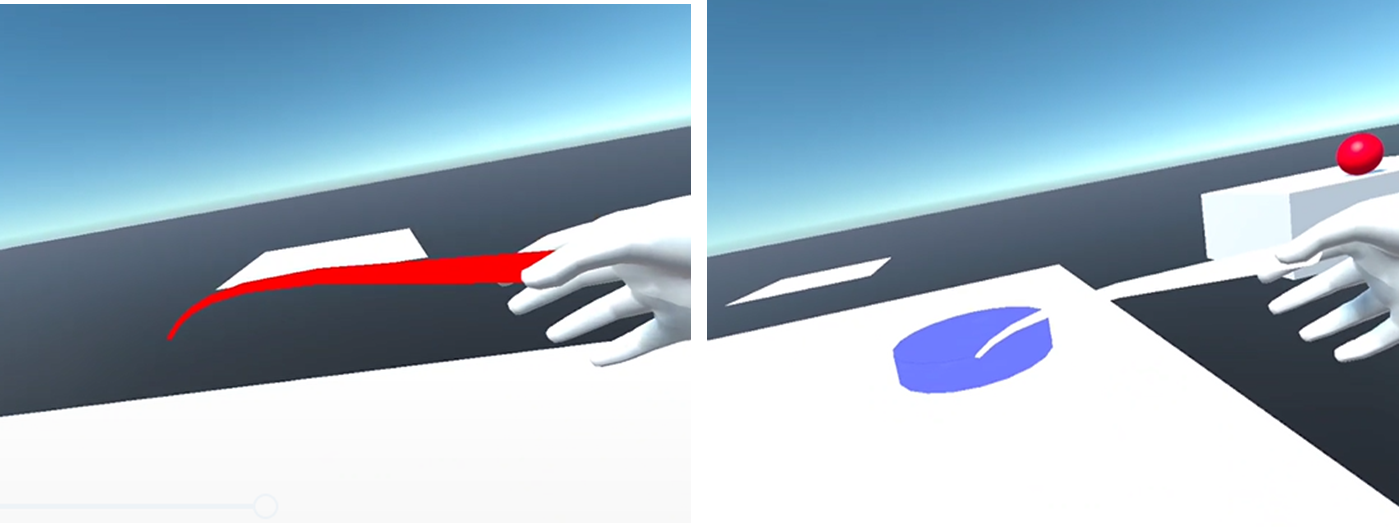
⑦ 실행하기
4.3. Ray 활성화/비활성화 하기
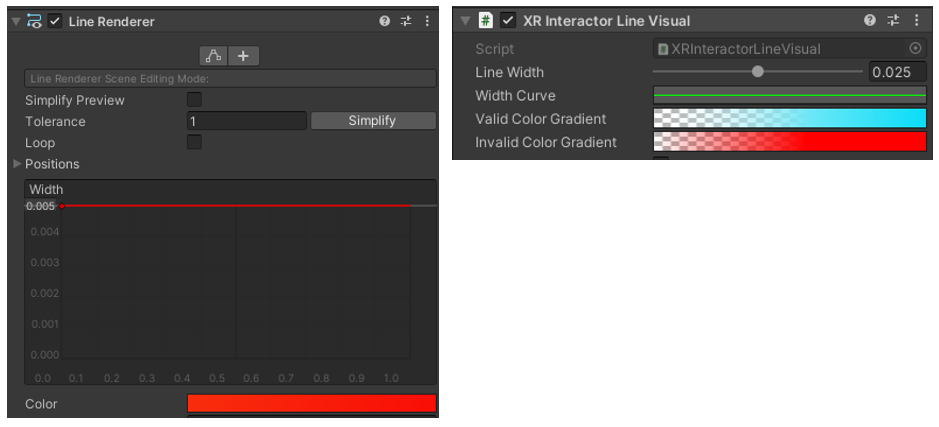
① 하이러키 창에서 XR Origin의 Right Teleport Ray를 선택한후 인스펙터 창에서 Line Render의 Color를 RGB(255,0,0)으로 변경한다.
② XR Interactor Line Visual의 Valid Color Gradient와 Invalid Color Gradient의 색을 각각 RGB(0,255,255) 과 RGB(255,0,0)으로 변경한다.
③ 하이러키 창에서 XR Origin을 선택한 후 인스펙트 창에서 [Add component] 버튼을 클릭하여 LocomotionController 스크립트 추가한다.
LocomotionController.cs
using System.Collections;
using System.Collections.Generic;
using UnityEngine;
using UnityEngine.XR.Interaction.Toolkit;

public class LocomotionController : MonoBehaviour
{
    public XRController leftTeleportRay;
    public XRController rightTeleportRay;
    public InputHelpers.Button teleportActivationButton;
    public float activationThreshold = 0.1f;

    // Update is called once per frame
    void Update()
    {
        if(leftTeleportRay)
        {
            leftTeleportRay.gameObject.SetActive(CheckIfActivated(leftTeleportRay));
        }

        if (rightTeleportRay)
        {
            rightTeleportRay.gameObject.SetActive(CheckIfActivated(rightTeleportRay));
        }
    }

    public bool CheckIfActivated(XRController controller)
    {
        InputHelpers.IsPressed(controller.inputDevice, teleportActivationButton, out bool isActivated, activationThreshold);
        return isActivated;
    }
}
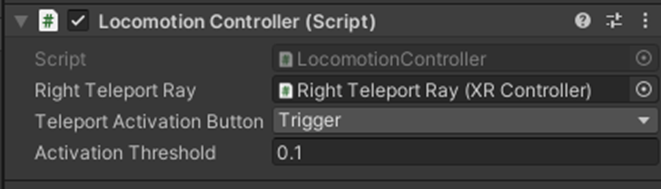
④ 하이러키 창에서 XR Origin을 선택한 후 인스펙트 창에서 LocomotionController 컴포넌트의 Right Teleport Ray 속성에 하이러키 창에서 XR Origin의 Right Teleport Ray설정한다.
⑤ Teleport Activation Button은 Trigger 설정한다.
⑥ 실행하기